
Installing a curtain rod seems simple until the curtains start sagging, the brackets loosen, or the entire setup looks uneven after everything is finished. A well-installed curtain rod does more than hold fabric; it improves light control, makes windows appear larger, and gives the room a cleaner, more finished appearance.
Whether you’re installing blackout curtains in a bedroom, styling a modern living room, or trying a no-drill setup in a rental apartment, the difference usually comes down to proper measurements, strong support, and smart placement.
Why Curtain Rod Placement Matters So Much
A lot of homeowners spend money on beautiful curtains but rush the installation process. Unfortunately, poor placement can make even expensive curtains look awkward.
A rod installed too low can make ceilings feel shorter. A rod that’s too narrow blocks natural light and visually shrinks the window. Weak brackets may hold initially, but start leaning after a few months, especially with heavier fabrics.
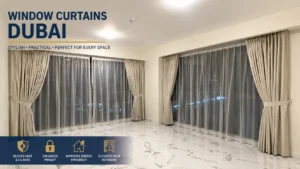
Professional interior installers often place curtain rods higher and wider than people expect. This simple adjustment makes rooms feel taller, brighter, and more open. In many modern apartment interiors, especially in sunny cities like Dubai, curtain placement is carefully planned because strong sunlight affects both comfort and room aesthetics throughout the day.
Tools You Need Before Starting
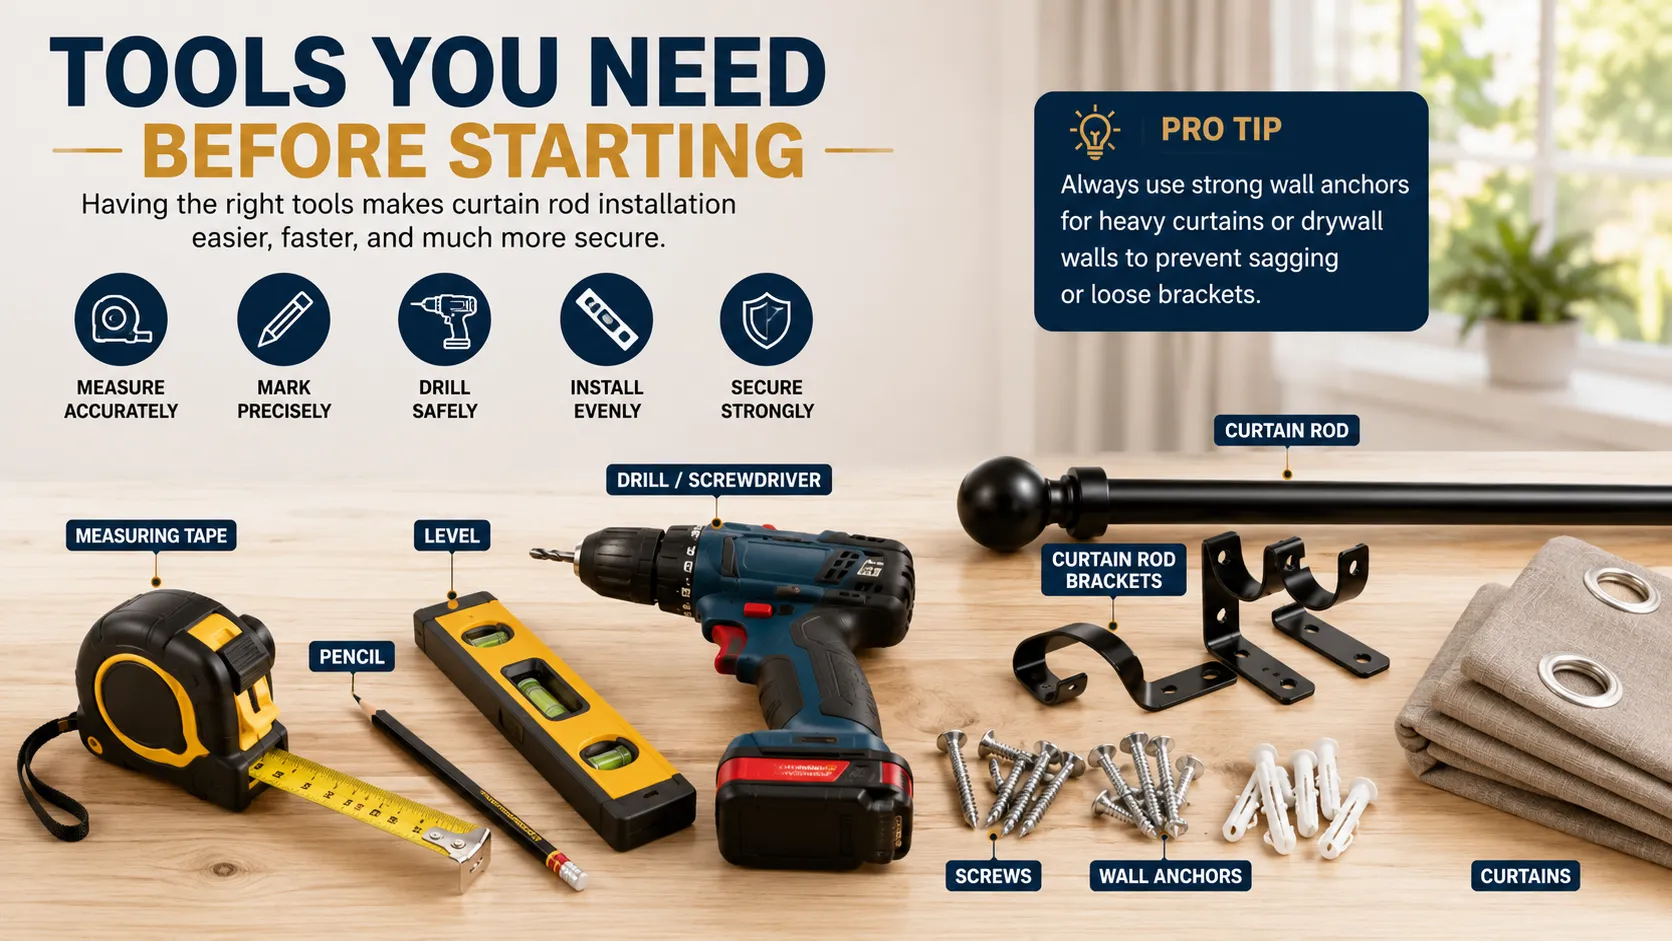
Most curtain rod installations only require basic tools, but choosing the correct hardware prevents long-term problems later. You will need:
- Measuring tape
- Pencil
- Drill or screwdriver
- Level
- Screws and wall anchors
- Curtain rod brackets
- Step ladder
For drywall installations, strong anchors matter more than many beginners realize. Cheap plastic anchors often loosen after repeated curtain movement, especially when heavy blackout curtains are used daily. Metal anchors or high-quality expansion anchors usually hold much better over time.
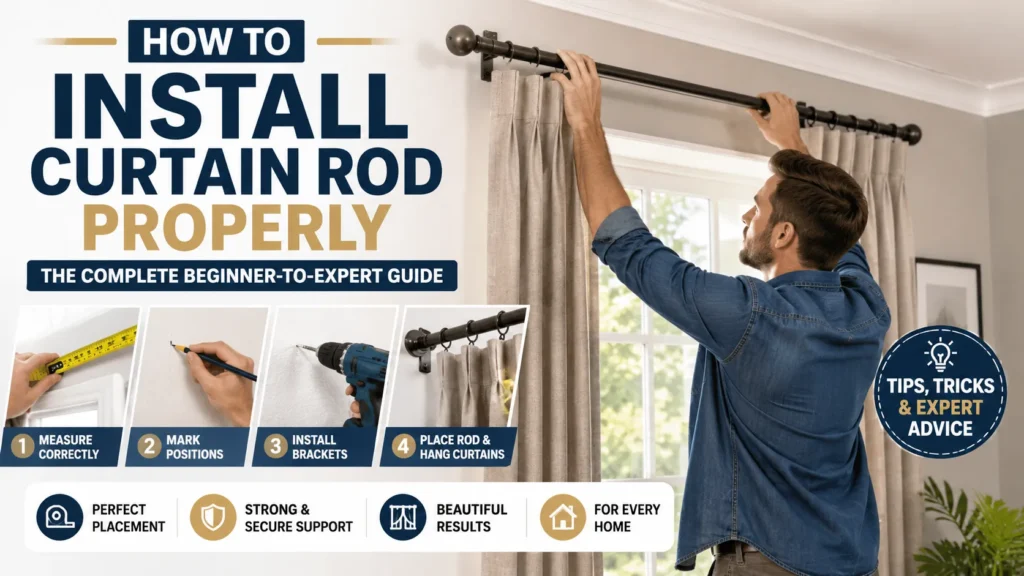
How to Install a Curtain Rod Step by Step: Measure the Window Correctly
Start by measuring the width of the window frame carefully. One of the most common beginner mistakes is choosing a curtain rod that matches the exact width of the window. This usually causes the curtains to block part of the glass even when fully open. Instead, extend the rod beyond both sides of the window frame. For most windows:
- Extend the rod 6–12 inches past each side
- Use curtains roughly 1.5–2 times wider than the window
This creates fuller-looking curtains while allowing more natural light into the room. In smaller apartments, wider rod placement can noticeably improve how spacious the room feels.
Decide the Correct Curtain Rod Height
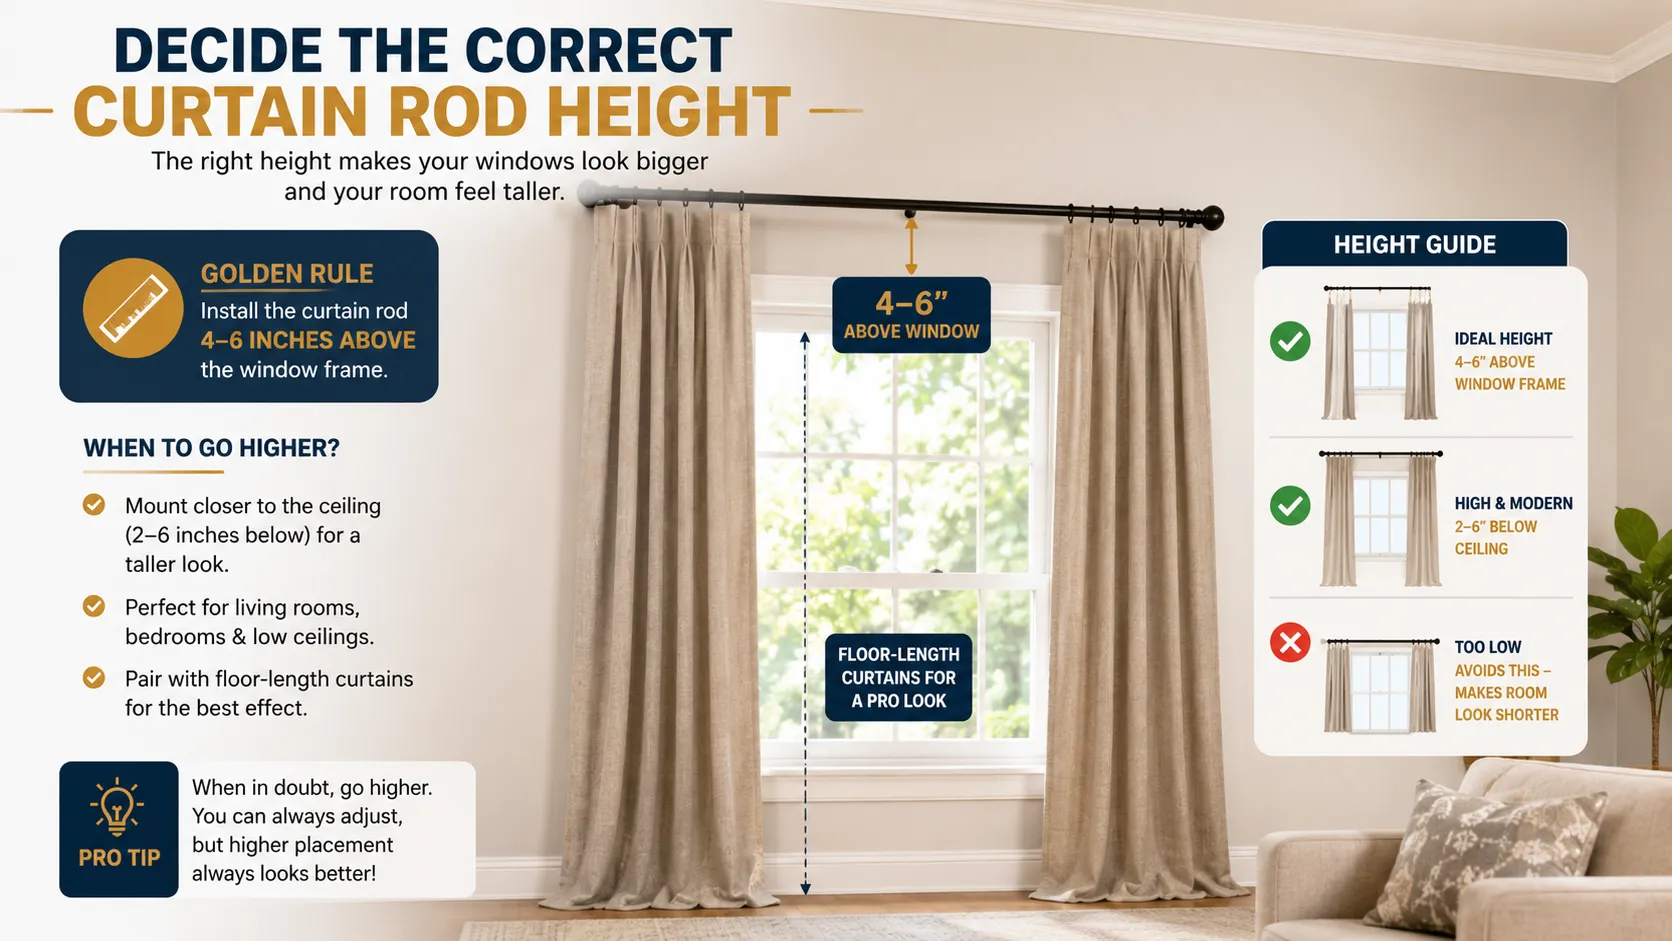
Curtain rod height has a surprisingly large effect on room proportions. Most standard setups place the rod around 4–6 inches above the window frame. However, modern interior styling often places rods much closer to the ceiling to create a taller visual effect. This works especially well in:
- Living rooms
- Bedrooms
- Apartments with lower ceilings
- Narrow spaces
Floor-length curtains also create a cleaner and more premium appearance compared to curtains that stop above the floor. One thing many homeowners realize too late is how obvious uneven curtain height becomes once sunlight enters the room. Even small measurement mistakes stand out immediately.
Mark the Bracket Positions Carefully
After deciding the width and height, mark the bracket positions lightly with a pencil. This step sounds easy, but it’s where many installations go wrong. Visual guessing is surprisingly inaccurate on walls. Even experienced installers use a level because tiny differences become very noticeable after the curtains are hung. Before drilling, double-check:
- Height consistency
- Distance from the window edges
- Bracket spacing
Spending an extra few minutes here usually prevents frustration later.
Drill Pilot Holes
Pilot holes make screw installation easier and reduce the risk of wall damage. For drywall:
- Use proper wall anchors
- Especially important for blackout curtains
For concrete walls:
- Use masonry drill bits
- Drill slowly to avoid cracking
Concrete walls usually take longer than drywall installations. Many people underestimate how difficult drilling near reinforced concrete sections can be around apartment windows. If the drill suddenly struggles, you may have reached reinforced material inside the wall.
Install the Curtain Rod Brackets
Once the pilot holes are ready, install the curtain rod brackets securely. The brackets should feel stable without movement or wobbling. Avoid overtightening screws because excessive pressure can weaken drywall anchors or damage softer wall materials.
For wider windows, center support brackets are extremely important. Long curtain rods often start sagging in the middle after repeated use, especially when holding thick blackout curtains. Steel rods generally perform much better than lightweight aluminum rods for large windows or heavy curtains.
Place the Curtain Rod and Hang the Curtains
Before placing the rod into the brackets, slide the curtains onto the rod if necessary. Then:
- Position the rod inside the brackets
- Tighten any locking screws
- Adjust the curtain spacing evenly
After installation, open and close the curtains several times. Sometimes a setup appears level initially, but slight alignment problems become obvious once the curtains move across the rod. Nothing feels more frustrating than realizing the curtain rod is uneven after everything is fully installed.
How to Install Curtain Rods Without a Drill
No-drill curtain rod systems are extremely popular in rental apartments because they avoid wall damage. These systems work best for lightweight curtains and temporary installations. The most common no-drill options include tension rods, adhesive brackets, and command hooks.
No-Drill Method | Best For | Long-Term Reliability |
Tension Rod | Small windows | Good |
Adhesive Brackets | Lightweight curtains | Medium |
Command Hooks | Temporary setups | Medium |
Magnetic Rods | Metal surfaces | Limited |
Tension rods usually last longer than adhesive systems because heat and humidity gradually weaken adhesive strength over time. In warmer climates, adhesive curtain mounts sometimes loosen much faster than expected.
How to Install Curtain Rod Brackets Without a Drill
Installing curtain rod brackets without drilling requires patience and proper surface preparation. Start by cleaning the wall thoroughly. Dust, moisture, or oily paint can reduce adhesive strength significantly. After marking the bracket positions:
- Remove the adhesive backing
- Press brackets firmly for 30–60 seconds
- Allow several hours before hanging curtains
A lot of people skip the waiting period and hang curtains immediately. That is one of the main reasons adhesive brackets fail early. For lightweight linen curtains, no-drill systems usually work well. Thick blackout curtains, however, can eventually pull adhesive brackets away from the wall unless the product is designed for heavier loads.
How to Hang Curtain Rods in Living Room
Living room curtain placement affects the entire visual balance of the space. Modern living rooms usually look better when curtain rods are mounted:
- Higher than the window frame
- Wider than the window itself
- Close to the ceiling when possible
This creates a more open and elegant appearance. Many homeowners also layer sheer curtains with blackout curtains using double curtain rods. During the day, sheer curtains soften sunlight while maintaining some privacy. At night, blackout curtains improve insulation and block outside visibility.
This layered curtain style has become increasingly common in modern homes because it balances natural light with privacy much better than single-layer setups.
Choosing the Right Curtain Rod
Not all curtain rods are designed for the same purpose. The right choice depends on:
- Curtain weight
- Window width
- Interior style
- Daily usage frequency
Decorative rods may look attractive, but sometimes lack the strength needed for heavier fabrics.
Curtain Rod Type | Best Use |
Standard Rod | Everyday curtains |
Double Rod | Layered curtains |
Decorative Rod | Luxury interiors |
Traverse Rod | Smooth curtain movement |
Tension Rod | No-drill setups |
For larger windows, thicker steel rods with center support brackets usually provide the best long-term durability.
Why Blackout Curtains Need Stronger Support
Blackout curtains are heavier than regular curtains because of their thicker layered construction. They are commonly used in:
- Bedrooms
- Nurseries
- Home theaters
- Apartments exposed to strong sunlight
Besides blocking sunlight, blackout curtains also help reduce indoor heat and improve sleeping conditions. One common mistake is installing blackout curtains on lightweight decorative rods. The rod may appear fine initially, but begin bending slowly over time. Choosing stronger hardware from the beginning prevents this problem completely.
What Is an Air Curtain?
An air curtain is different from fabric curtains and curtain rods. It is an electrical device installed above entrances that blows air downward to create an invisible barrier between indoor and outdoor environments. Air curtains are commonly used in:
- Restaurants
- Shopping malls
- Warehouses
- Commercial buildings
They help reduce dust, insects, and temperature loss while keeping doors open.
How to Fix Common Curtain Rod Problems
Even properly installed curtain rods can develop problems over time. If the rod starts sagging in the center, adding a middle support bracket usually solves the issue immediately. If brackets begin pulling away from the drywall, the original anchors may be too weak for the curtain’s weight. Replacing them with stronger expansion anchors normally fixes the problem.
Uneven curtains often happen because one bracket sits slightly higher than the other. Rechecking measurements with a level usually identifies the issue quickly. Curtains dragging heavily across the floor may need slight rod height adjustments or hemming. These small troubleshooting fixes are common, even in professionally installed setups.
Common Curtain Rod Installation Mistakes
Many installation problems happen because of small details that people ignore early in the process. The most common mistakes include:
- Installing the rod too low
- Choosing rods that are too narrow
- Using weak wall anchors
- Ignoring the curtain weight
- Skipping center support brackets
- Rushing measurements
Another frequent issue is placing brackets too close to the window trim. This causes curtains to bunch awkwardly and limits smooth movement. Careful measuring usually prevents most long-term problems before they happen.
Expert Tips for a More Professional Look
Professional-looking curtain setups usually come from small details rather than expensive materials. Interior designers often recommend mounting curtain rods closer to the ceiling instead of directly above the window. This naturally draws the eye upward and makes the room feel larger.
Matching curtain rod finishes with nearby fixtures such as lighting, door handles, or furniture accents also creates a cleaner and more coordinated appearance. For wide living room windows, thicker rods with center support brackets almost always look better and last longer.
How Long Does Curtain Rod Installation Take?
For most standard windows:
- Beginners usually need around 30–60 minutes
- Experienced DIY installers often finish within 20–30 minutes
Concrete walls, ceiling-mounted systems, and oversized windows usually require additional time. No-drill installations are typically faster because they avoid drilling and anchor installation completely.
Should You Hire a Professional?
Most homeowners can install standard curtain rods themselves without major difficulty. However, professional installation may be helpful for:
- Ceiling-mounted curtain systems
- Motorized curtains
- Extra-large windows
- High ceilings
- Luxury custom interiors
Professional installers can also help maintain perfect visual alignment in rooms with multiple windows where symmetry matters more.
Frequently Asked Questions
How high should I install a curtain rod?
Most curtain rods are installed 4–6 inches above the window frame. Installing closer to the ceiling creates a taller room appearance.
Can I install curtain rods without drilling?
Yes. Tension rods, adhesive brackets, and command hooks allow no-drill installation for lightweight curtains.
Do blackout curtains require stronger curtain rods?
Yes. Blackout curtains are heavier and need stronger rods with proper anchors and center support brackets.
Why do curtain rods sag in the middle?
Sagging usually happens because the rod is too thin or lacks center support for the curtain’s weight.
Are adhesive curtain rod brackets reliable?
They work well for lightweight curtains, but heavy fabrics may weaken adhesive systems over time, especially in humid or warm conditions.
What type of curtain rod works best for living rooms?
Double curtain rods and decorative steel rods are popular choices because they support layered curtains and improve the overall room appearance.
Final Thoughts
Learning how to install curtain rod systems properly is not just about drilling holes into a wall. The right curtain placement improves room balance, enhances natural light, and makes windows appear larger and more elegant. Strong brackets and proper support also help prevent common issues like sagging rods or loose hardware over time.
Whether you are installing blackout curtains, decorating a modern living room, or searching for how to install curtain rod solutions without drilling, careful measurements always make a noticeable difference in the final result.
If the process feels confusing or time-consuming, Ujala Interior can handle everything professionally, from curtain rod installation to complete curtain styling solutions for modern homes.